
We are National Park enthusiasts -- Join us as we share the best way to visit our National Parks!
The Jeep Build
The Base Platform
We stripped everything out of the back of the Jeep for a clean, fresh start. Since we’re going to be living in the Jeep, we need all the space we can get, in a comfortable way! To maximize storage options, we oped to create a base ‘platform’ for the Jeep that will make the entire back level. From there, we can slide our own drawers and storage units into place.
Goose Gear makes a really beautiful base platform for the JKU, but it starts off at $675 for the 60% floor plate. I’ve seen a few of these in person and they are really well built. At this stage of the Jeep life, I can’t justify the price. It falls into the ‘Nice to Have’ category and I’d rather spend the funds on upgrades to the batteries, water, solar systems or fridge. A wooden platform isn’t going to increase the number of days you can spend out on your own.
For a fraction of the price, I could build my own! Before I get into the full build tutorial, here’s a before and after picture.

The Jeep after stripping out the carpet, trim and backseats.

Custom build wooden platform for the JKUR.
The Build
Time: 5 Hours + drying time
Cost: Less than $200
Complexity: Medium. Requires knowledge of basic wood cutting techniques and equipment.
Materials
The materials for this build are listed on the right side of this page on desktop and are at the bottom for mobile. I try and link to the exact products I used, otherwise I use the closest alternative.

Prep Work
Before starting to build your own platform, you should decide if you’re going to keep or remove the trim, carpet and seats. I elected to remove all the trim and carpet, and seats (for now). Depending on what you want, you could keep all the trim, carpet and seats and still create a base platform that either sits overtop of the seats when they fold down, or only extends to the base of the seats. With the JKU you can remove the 40% seat without any modifications, however if you want to remove the 60% and leave the 40% in, then you are going to need a special bracket to mount the seat bolts and seatbelt to. There use to be several companies that made these, however the only one I can find is made by Goose Gear and costs ~$100 plus shipping.
Whatever you decide, the first and arguably the most important step in this document is to get accurate measurements of the space you are building for.
Measure twice, cut once.
The biggest mistake you can make is cutting too soon… Take measurements and build yourself a blueprint on a standard notecard or sheet of paper.
Construction
- Prototype: Lets test out your measurements. Find one or two large pieces of old cardboard. Old boxes are perfect. Using a box cutter, cut open the box and lay it out flat on the ground. Use a tape measure, sharpie and straight edge, measure out the final dimensions of your platform. After you have it drawn out, cut it out using the box cutter. Insert the cardboard into the back of the Jeep and see how good of a fit it is! You are looking for just a minor gap between the cardboard and the edge of the area, ~1/4 of an inch on each side is plenty! If it fits, awesome move on to the next step, otherwise, go back and adjust your measurements and make any corrections before moving on. (It took me a few tries before I got it!).

The cardboard prototype
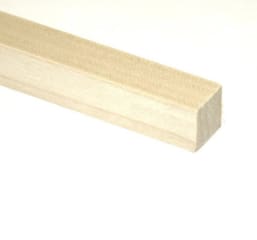
- Wood Selection: By this point, you have a large piece of cardboard that fits nicely into the back of your Jeep. Now you need to select which kind of wood you want to use to make the real platform out of. I elected to go for a marine-grade piece of plywood. Why marine-grade? I never wanted to worry about the wood rotting if it ever got wet. Its also built using higher standards then standard plywood.
- Okoume marine grade plywood: The most expensive option, its lighter than meranti but not quite as strong. I used this since weight is a huge deal with Jeeps.
- Meranti marine grade plywood: Cheaper and stronger than okoume, but much heavier.
- Birch plywood: The cheapest, and heaviest option. It’s not water resistant, but significantly cheaper than any marine grade plywood. Since the platform is inside the Jeep, you could probably get away with using birch and coating it in something to keep the water off. Goose Gear use birch for their platform and coat it with commercial grade LineX.
- Start Cutting: Here we go! Now the fun begins. Using your handy dandy cardboard template as a guide, measure out the cuts needed on your plywood. I suggest using a pencil incase you make any errors. Even with the guide one side of my plywood was complexly FUBAR with pencil marks and erasing… Whoops… Luckily I double checked everything, flipped the board over and got it right the second time. Once you finish your markings, bring out the saw and lets get cutting! Since the design of the platform consists of mostly straight edges, I suggest using a good table saw for your cuts. I didn’t have one, so I used a combination of a circular saw and a jig saw. It got the job done. After completion, dust off your platform and squeeze it into the jeep and test out the fit! I made my platform in two parts so I could get it in and out of the jeep, otherwise you might have to take your top off and lower it in.
Notice the cutouts in the back corner next to the tailgate
It fits, nice and snug
- Coating the Wood: In order to protect your platform from scratches, water, dirt, etc, it is helpful to add a protective coating. You can coat the platform in anything you’d like, but I recommend something that will prevent objects from sliding around, scratch and water resistant and easy to apply. Goose Gear uses professional grade LineX for their platforms and it is beautiful. LineX has to be applied by a professional and can be quite expensive. It’s one of the highest quality coatings you could apply to your platform. Unfortunately I didn’t have the resources to apply LineX to my platform and opted for a more DIY solution using Rust-Oleum Truck Bed Coating. I used two and a half cans on the platform. Coating it took about 15 minutes and I let it dry overnight. Make sure you do it away from anything you don’t want sprayed.
Sprayed with truck bed liner
- Place the supports: The platforms not going to hold itself up on its own. You’ll need to add some support posts and reenforce them incase they get bumped. I got 2 inch x 2 inch posts and cut them to the appropriate height. As a rule of thumb, add a post to all corners, and ensure theres a post within 2 feet of another. This grid of posts should support any weight you can throw on it. To help reduce rattle, I purchased a group of rubber ‘boots’ used on chairs and drilled them to the bottom.
Layout your support posts before you place the platform inside

Reenforce your support posts using some right angle brackets, and add rubber boots to the bottom to reduce rattle. You can also attach any accessories you need as well, such as a water pump and 12v cigarette lighter socket. (Since this post, I’ve added a bunch of other accessories and employed some intense wire management to ensure nothing breaks)
- Secure in Cabin: Carefully set your final platform in the Jeep and on any posts you’ve laid out. Shut all doors and sand-down any tight or sharp edges to make it fit as snug as possible. If its too loose it will rattle, if its too tight it will creek, find the middle ground.

Final platform, secured and ready to go


Tips
- Measure twice, cut once…
- Test the measurements inside as often as possible
- Don’t stress about the little details, it will work out!
Whew, you did it! That wasn’t too hard, and you just saved yourself $500+ by DIY. I hope this tutorial was helpful. If I left anything out, or you have additional questions, leave a comment below and I’ll get back to you! If you build a platform of your own, post it below so others can check it out.
In the next post, I’ll show you how I built custom boxes that double as camp furniture.

1 Comments
Post a Comment

Questions?
Join us LIVE on Instagram each Sunday where we share a trip update and answer questions you have!

Devan